Skip to content

2


IT'S TIME FOR A LVL1 MEGA-WORKSHOP!

Sign up now on EventBrite:http://lvl1summercamp2011.eventbrite.com

This summer only, at the LVL1 hackerspace in Louisville, KY, you can learn how to Design, Etch, Solder and Program your very own microcontroller project.

This series of four workshops will take place across every Saturday in June, from 1pm to 5pm.  The first Saturday, you'll learn how to use EagleCAD to route PCBs for manufacture.  No more perfboard!

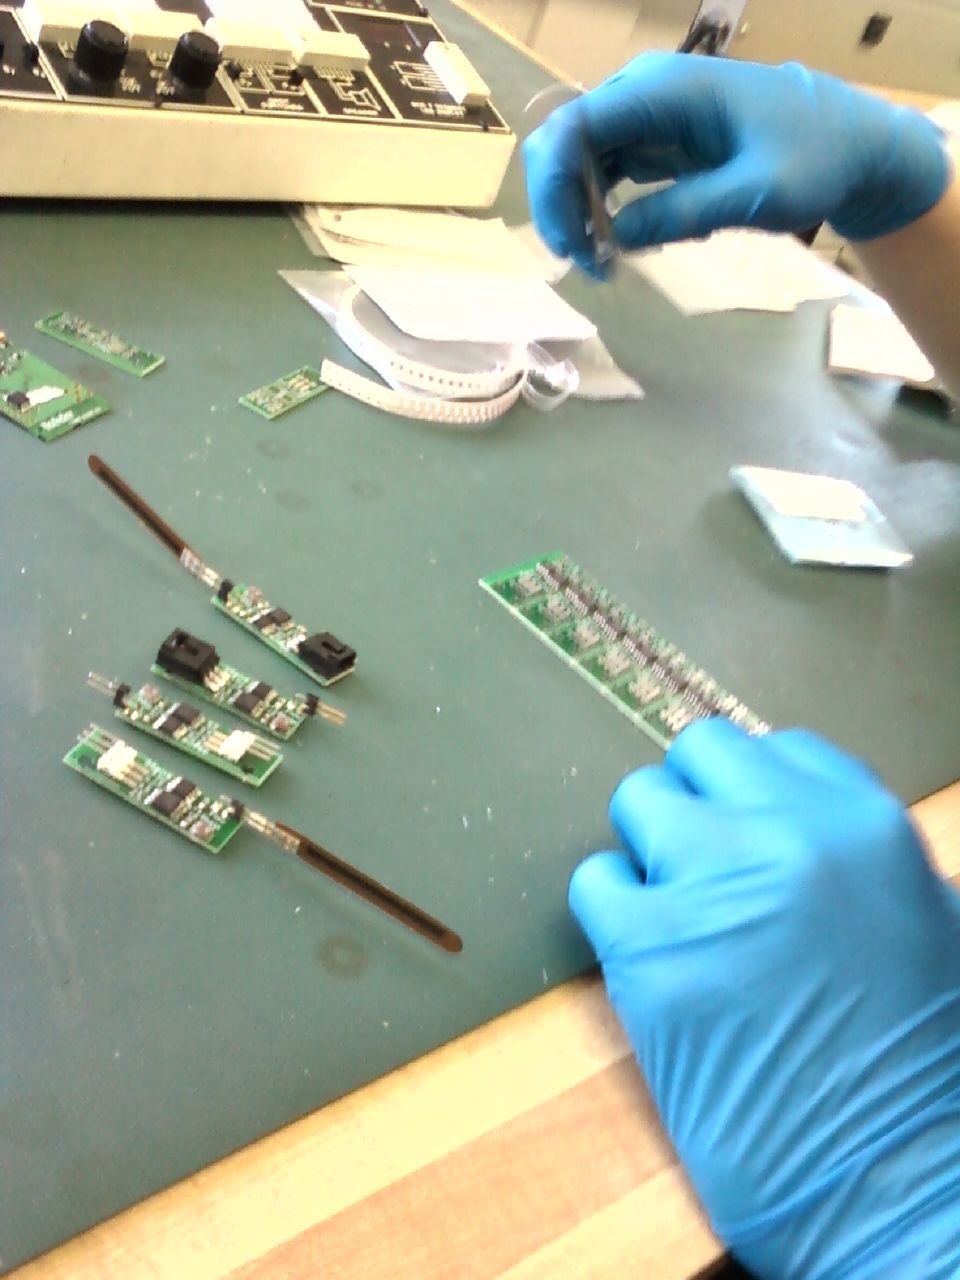
The second Saturday, you'll learn how to use dangerous chemicals to turn a blank copper board into a functional AVR programmer!  With this clone of LadyAda's USBTinyISP, you'll be able to program almost ever AtTiny and AtMega chip ever manufactured, freeing you from the surly bonds of the Arduino develoment environment.

The third Saturday, you'll learn extremely useful skills in prototyping with surface mount components, soldering tiny parts on to the boards you etched the week previous.  Surface Mount soldering is  an important skill, as projects and parts get smaller and more powerful.

Finally, on the fourth Saturday, you'll learn how to program a CapsLocker, a nefarious device which masquerades as USB keyboard.  This device is capable of entering any key sequence at any interval, super useful for makinG SURE YOUR MARK ALWAYS TYPES LIKE THIIS.  Or p#erha#ps #ann#o#yin# him# in ##eve#n #mo#r#e interes#ting #ways.

If you want to enroll in all four workshops, purchase the four-pack and the four pack only!  If you'd like to participate in just the etching and building, purchase the "Etching It and Soldering It" ticket.  If you'd like to participate in any just the Eagle or Programming workshop, without the fun parts to take home, simply purchase those tickets separately.  If you're confused, or would like any combination of the above workshops, contact us!

LVL1 members, you get a discount! Contact the appropriate authorities!

Sign up now on EventBrite:http://lvl1summercamp2011.eventbrite.com


14

Originally posted on my personal blog, Meat and Networking.

LVL1 is great.  A place for creative and motivated people to get together and goad each-other into doing more creative things.  It's also a great gathering place for tools, as well as knowledge.  A few months ago, the spoiled electrical engineer that I am, I never would have considered making my own PCBs.  Any project worth taking off the breadboard was worth sending to China to get made "right."

Of course, there isn't always time and money to send something to China.  Today's installment is the Sumo-bot board I'm trying to put together for the Hive13 sumobot competition.  Unfortunately, it doesn't look like poor Snoopy bot will make it to the ring, but the board making process itself is worth talking about.

Laying out a PCB using software like Eagle is beyond the scope of this post.  If you can follow the appropriate Sparkfun Tutorial, it's pretty easy to pick up.  Something to note:  for single sided home-made PCBs, put all traces and surface mount components on the BOTTOM layer.  Put any necessary jumpers on the top layer.  When you're ready to print, just turn off all the layers you don't want turned into copper.

...continue reading "Toner Transfer and Muriatic Acid Etchant: Making PCBs at LVL1"

This past weekend I experimented with dyeing some etched PCBs. I used Rit dye easily found in grocery stores. It was quick and dirty. I just boiled some water, mixed in a heavy concentration of black dye and let it sit for a couple of hours.
dyed pcbs


The dye worked well enough. Rather than just soaking in a cooling dye, I should have been applying a constant heat and agitating the solution in order to get a darker saturation. And when removing flux after soldering the board, dye came off as well. But in general this is a promising way to make nicer looking DIY PCB boards in the future.

3

The SALAMANDER triple sensor boards arrived and are under construction by students in the Gadget Lab at the University of Louisville. We used a laser-cut mylar stencil from Pololu to stencil solder paste onto the pads, then students placed the parts and we reflowed the solder on a hotplate. These boards were previously hand-soldered, but we need 50 of them for the summer so that had to change. If you're considering the hotplate method, it is very very good and you should try it. The Gadget Lab has a fancy "lab" hotplate but I have just acquired the $20 Target skillet and will try it soon with that. We do all the surface-mount parts this way, then stick on a few through-hole connectors. The staggered SparkFun connector footprint does hold the connectors in place nicely (though much better for the 3-pin ones than the 2-pin parts) Now we have 27 working boards, and the bottleneck has moved to testing and sensor calibration. One person's bottleneck is another person's summer research project!